![]()
Eagle.js - A slideshow framework for hackers
![]()

- Slideshow system built on top of the Vue 2
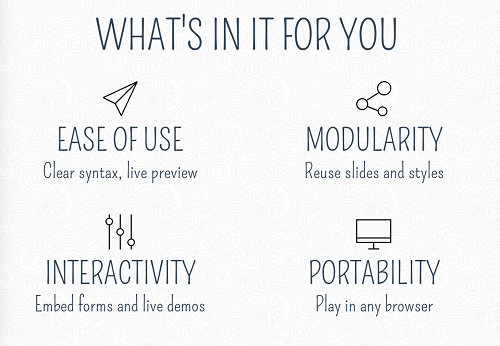
- Supports animations, themes, interactive widgets (for web demos)
- Easy to reuse components, slides and styles across presentations
- Lightweight core and various helpful extensions
- All APIs public, maximum hackability
This project is considered feature-completed and not actively maintained currently. We recommend you to use slidev for better support of Vue 3.
For a quick tour, see this slideshow:
Most of all, eagle.js aims at offering a simple and very hackable API so you can get off the beaten tracks and craft the slideshows you really want.
Here is what the eagle.js syntax looks like (Example here are using Pug, but you can still use plain HTML):
.eg-slideshow
    slide
      h1 My slideshow
      h4 By Zulko

    slide
      h3 Title of this slide
      p  Paragraph 1.
      p  Paragraph 2.

    slide(:steps=3)
      h3 Slide with bullet points
      p(v-if='step >= 2') This will appear first.
      p(v-if='step >= 3') This will appear second.
If you are not familiar with Vue.js you will find eagle.js harder to use than, say, Reveal.js, but on the long term eagle.js makes it easier to organize your slides and implement new ideas.
Templates
- elpete/eaglejs-template Eagle.js Template for vue-cli.
- christian-nils/presentation_template Presentation template using VueJS and EagleJS, with some custom components. (demo)
Get started
You must have Node.js/npm installed to use eagle.js.
Then the best to get started is to clone the example repo:
$ git clone https://github.com/Zulko/eaglejs-demo.git
Install the dependencies (they will only be downloaded in a local folder):
$ cd eaglejs-demo
$ npm install
Then run npm run dev to start the server, and open your browser at http://localhost:8080 to see the slideshows.
To start editing, click on My first slideshow to display this slideshow, then open the file eagle/src/slideshows/first-slideshow/FirstSlideshow.vue and change the content of the first slide. Observe the changes happen automatically in your browser. The only times you need to refresh the page is when you add remove or add slides to the presentation.
Install
Install by npm
npm install --save eagle.js
Or install by yarn
yarn add eagle.js
Usage
Eagle.js is a vue plugin. You need to use eagle.js in your vue app’s main file.
New in 0.3: animate.css is now a peer dependency. User need install their own version.
New in 0.5: By default eagle.js doesn’t export all plugins but only core components. You have to explicitly use your widgets or plugins from now on. See more on extensions section.
New in 0.6: You do not need to explicitly import the default style anymore.
import Eagle from 'eagle.js'
// import animate.css for slide transition
import 'animate.css'

Vue.use(Eagle)
Basic idea
Eagle.js’s basic components are slideshow and slide. You use slideshow as mixin to write slideshow component, which could include multiple slides. A very basic Single File Component for slideshow would look like this:
<template lang="pug">
    slide(:steps="4")
      p(v-if="step >= 1")
        | {{step}}
      p(v-if="step >= 2")
        | {{step}}
      p(v-if="step >= 3")
        | {{step}}
      p(v-if="step >= 4")
        | {{step}}
</template>

<script>
import { Slideshow } from 'eagle.js'
export default {
  mixins: [Slideshow]
}
</script>
We use slideshow’s data step to control the conditional rendering in slide, thus slideshow is used as a mixin. Also by this way eagle.js exposes the maximum hackability to users.
slideshow
slideshow can only be used as mixin.
Note: For vue mixins, template cannot be extended. slideshow needs one HTML element to wrap around your following slides because there are events registered to slideshow after component mounted. We recommend you to wrap your template in a eg-slideshow div for default styling. Also, do not add conditional rendering on slideshow (for example, add v-if="active" on your slideshow template) as it would break slideshow’s events registration as well.
You can configure your authored slideshow component with these properties:
| Property | Default | Description |
|---|---|---|
firstSlide |
1 |
|
lastSlide |
null |
|
startStep |
1 |
|
mouseNavigation |
true |
Navigate with mouse click or scroll event |
keyboardNavigation |
true |
Navigate with keyboard |
embedded |
false |
|
inserted |
false |
|
onStartExit |
null |
event callback for exiting slideshow through first slide |
onEndExit |
null |
event callback for exiting slideshow through last slide |
backBySlide |
false |
slideshow navigates back by step by default |
repeat |
false |
go to first slide automatically when reaching the last one |
zoom |
true |
alt + click can zoom on slide |
More explaination on backBySlide:
By default, slideshow navigates back by step, but you can change the behavior to be slide based: so if you go back to the previous slide, it lands on the first step instead of last step. See a comparison:
| Back by Step: | Back by slide: |
|---|---|
 |
 |
Please note, if you have any embedded slideshows, you have to use default back mode, because for now parent slideshow cannot know how many steps child slideshow backs. This is a feature to be implemented in the future.
Nested slideshow
A nested slideshow can be an inserted one or an embedded one. If the nested slideshow’s parent is a slideshow, then it’s an inserted slideshow; if the parent is a slide, then it’s an embedded slideshow. An embedded slideshow would have its own events and embedded styles, while an inserted slideshow does not. Do not mix them up: a embedded slideshow in a slideshow will replace its parent slideshow, while a inserted slideshow inside a slide will simply not work.
slide
slide can be used both as mixin or component. If your want to author a complex slide, writing it as a seperated SFC with slide mixin would really help. Including the following template(pug) as wrapper in your slide component to keep the default style:
eg-transition(:enter='enter', :leave='leave')
  .eg-slide(v-if='active')
    .eg-slide-content
      // Your own markup...
You can configure slide with these properties:
| Property | Default | Description |
|---|---|---|
skip |
false |
|
enter |
null |
Default enter animation |
enterPrev |
null |
Enter animation for prev direction |
enterNext |
null |
Enter animation for next direction |
leave |
null |
Default leave animation |
leavePrev |
null |
Leave animation for prev direction |
leaveNext |
null |
Leave animation for next direction |
steps |
1 |
Total steps for this slide |
mouseNavigation |
true |
Navigate with mouse click or scroll event |
keyboardNavigation |
true |
Navigate with keyboard |
enterPrev, enterNext, leavePrev and leaveNext provides flexibility if you want to customize the animation for prev/next direction. If set to null they will use default enter and leave styles.
Note: enter and leave must be set in pairs. Don’t only set one property, because slide has two directions to move: prev/next, and both directions needs animations. We recommend either you set animation for all your slide on both enter and leave, or don’t set any at all.
eg-transition
Under the hood, eg-transition is just vue’s transition that supports animate.css: you can use animate.css’s class name for enter and leave property and it just works. All eagle.js’s transition effects, including slide, happen with this component, and you can use it just like using vue’s transition.
Extensions
Starting from 0.5 we introduced extensions to eagle.js. It includes two categories, namely widgets and plugins: 1. Widgets are Vue components that can be directly used in a slide. 2. Plugins are used in slideshow to enhance slide globally.
Both widgets and plugins have the same interface to use, just like how Vue uses plugins, for example:
// plugin
Eagle.use(Zoom, {scale: 2})
// Widget
Eagle.use(CodeBlock)
Widgets
Eagle.js ships several useful widgets that can be used in your slide: 1. eg-modal 2. eg-code-block (code highlighted by highlight.js) 3. eg-code-comment 4. eg-toggle 5. eg-radio-button 6. eg-triggered-message
Using widgets is really simple
import Eagle, { Modal, CodeBlock } from 'eagle.js'

Eagle.use(Modal)
Eagle.use(CodeBlock)

// You can still do this, which eagle does the same under the hood
// Vue.component(Modal.name, Modal)
// Vue.component(CodeBlock.name, CodeBlock)
Widgets’ name follows the same rule: uppercase for importing, eg prefixed lowercase connected with dash in HTML. See more of their usage in the demo project.
New in 0.3: highlight.js is not a dependency anymore, so if you need to use eg-code-block, you need to install your own version of highlight.js, then specifiy it in your main.js:
// import your own highlight.js(only for javascript)
import hljs from 'highlight.js/lib/highlight';
import javascript from 'highlight.js/lib/languages/javascript';
hljs.registerLanguage('javascript', javascript);
// then pass it to eagle
import { Options } from 'eagle.js'
Options.hljs = hljs
This way drastically decrease eagle.js’s package size and user could manage their own highlight.js version.
Presenter Plugin
You can use presenter plugin to enable presenter mode:
// first, use plugin in your entry file
import Eagle, {Presenter} from eagle.js

Eagle.use(Presenter, {
  presenterModeKey: 'a' // default is p
})

// second, in your slideshow, declare two `data` property
{
  data: function () {
    return {
      childWindow: null,
      parentWindow: null,
      // .. the rest of your data
    }
  }
}
Press your configured button would toggle presenter mode: you have two windows that share control with each other. Enabling presenter mode gives user two addition data for slideshow: parentWindow and childWindow. For example:
.eg-slideshow
  slide
    p Eagle.is is awesome!
    p(v-if="parentWindow") I can be a note!
    p(v-if="childWindow") I can be a note too!
It might be counter-intuitive that (v-if="parentWindow") is actually child window. It’s because it means this window has a parent window, thus making itself a child window. But it is really just user’s preference to put notes in either window, as two windows are almost functionally identical, except only parent window could close persenter mode.
Zoom Plugin
You can use zoom plugin to enable zoom mode:
import Eagle, {Zoom} from eagle.js

Eagle.use(Presenter, {
  scale: 1 // default is 2
})
Option+Click (Alt+click on non-Mac) would zoom in and out.
Themes
For minimum working style, you need to wrap your slideshow template in a eg-slideshow container. Eagle.js also has two themes for now: argume and gourmet. You can import theme style instead of default one to use them:
// in your main.js
import 'eagle.js/dist/themes/gourmet/gourmet.css'
To make theme style work, in your slideshow you should also have a wrapper with theme class, for example if you are using gourmet theme:
<div class="eg-theme-gourmet">
  <div class="eg-slideshow">
    ...
  </div>
</div>
Advanced usages
API
If you want to customize eagle.js, most likely you will work on slideshow component. In this case, We recommend you to read through slideshow’s source code to get a better understanding of how eagle.js works. Because slideshow works as a vue mixin, all data and method will follow vue’s option merging rule. If you are not sure about whether you overwrite eagle.js’s API, you can put your functions in afterMounted, which eagle.js exposes explicitly for users.
slideshow’s mostly used methods are nextStep, previousStep, nextSlide, previousSlide, which are pretty self-explanatory.
Mobile Support
Eagle.js supports basic mouse, keyboard and touch event, but doesn’t support any advanced mobile gestures, like ‘swipe’. Still, it is very easy to add mobile support with a well-tested library, like hammer.js.
In your slideshow component’s mounted lifecycle hook,
mounted: {
  // You can also register to this.$el if you want
  // to control the gesture only on your slideshow component
  const hammer = new Hammer(window)
  hammer.on('swiperight', () => {
    this.previousStep()
  })
  hammer.on('swipeleft', () => {
    this.nextStep()
  })
}
Permalinks
Eagle.js does not comes with permalinks implementation, because eagle.js does not assume your usage with it. Using eagle.js as a completely standalone slideshow, like reveal.js or Remark, or as a component inserted into your routes, permalinks can get quite different. What’s more, vue-router is not a dependency for eagle.js. So it’s not a ‘battery included’ situtation. However, it is fairly easy to implement your own.
The most common implementation for permalinks is to use hashbang in URLs. You can achieve with with vue-router’s hash mode, or even better, with history mode, to get rid of the ugly hashbang. Also with vue-router, it gives your more flexibility and more granularity control.
For example, if we are using Eagle.js as a standalone application. In our router file:
const router = new VueRouter({
  routes: [
    {
      path: '/:slide/:step',
      component: MySlideshow
    }
  ]
})
And inside a MySlideshow, add watchers to update URL when slides changes, and update slides when URL changes:
 ....
  methods: {
    ....
     updateSlides: function () {
      this.currentSlideIndex = +this.$route.params.slide
      this.$nextTick(() => {
        this.step = +this.$route.params.step
      })
    },
    updateURL: function () {
      this.$router.push(`/${this.currentSlideIndex}/${this.step}`)
    }
  },
  watch: {
    '$route': 'updateSlides',
    step: 'updateURL',
    currentSlideIndex: 'updateURL'
  }
Code splitting
Intuitively, writing your slide components and then using Vue’s async component by dynamically importing slide components in your slideshow sounds like a perfect solution, unfortunately this won’t work, as slideshow needs all its $children to be properly initialized. Currently, if you really need to do code splitting, you can consider splitting your slideshow in different routes and lazy-loading them.
Frequently Asked Questions
-
(Vue-CLI v.4+) The white-spaces in my code are not preserved by the CodeBlock widget, how can I fix it?
The way Vue-CLI treats white-spaces has changed in the version 4. If you use Vue-CLI to create your slideshow, you will need to add the following configuration in your vue.config.js file (see issue#90).
// vue.config.js
module.exports = {
    chainWebpack: config => {
      config.module
        .rule('vue')
          .use('vue-loader')
            .tap(args => {
              args.compilerOptions.whitespace = 'preserve'
            })
    }
  }
Contribute
Eagle.js is an open source framework originally written by Zulko and released on Github under the ISC licence. Everyone is welcome to contribute!
Below are a few ideas that deserve more attention in the future:
- Bundler to make standalone HTML presentations
- PDF export?
- Themes
- Better docs? (What do JavaScript people use to write docs?)
Development
Eagle.js uses storybook for development:
$ git clone https://github.com/Zulko/eagle.js.git
$ npm install
$ npm run storybook
Maintainers
Описание
A hackable slideshow framework built with Vue.js