Cerebro
Cerebro is an open-source launcher to improve your productivity and efficiency
![]()
Usage
You can download the latest version on the releases page.
- If there isn’t an installer for your OS, check build instructions.
- If you are a linux user see how to install the executable
After the installation, use the default shortcut, ctrl+space, to show the app window. You can customize this shortcut by clicking on the icon in the menu bar, and then selecting “Preferences…”.

Plugins
Core plugins
- Search the web with your favourite search engine
- Search & launch application, i.e.
spotify - Navigate the file system with file previews (i.e.
~/Dropbox/passport.pdf) - Calculator
- Smart converter.
15$,150 рублей в евро,100 eur in gbp;
Install plugins
You can manage and install more plugins by typing plugins <plugin-name> in the Cerebro search bar.
Discover plugins and more at Cerebro’s Awesome List.
If you’re interested in creating your own plugin, check the plugins documentation.
Shortcuts
Cerebro provides several shortcuts to improve your productivity:
ctrl+c: copy the result from a plugin to the clipboard, if the plugin does not provida a result, the term you introduced will be copiedctrl+1...9: select directly a result from the listctrl+[hjkl]: navigate through the results using vim-like keys (Alsoctrl+oto select the result)
Change Theme
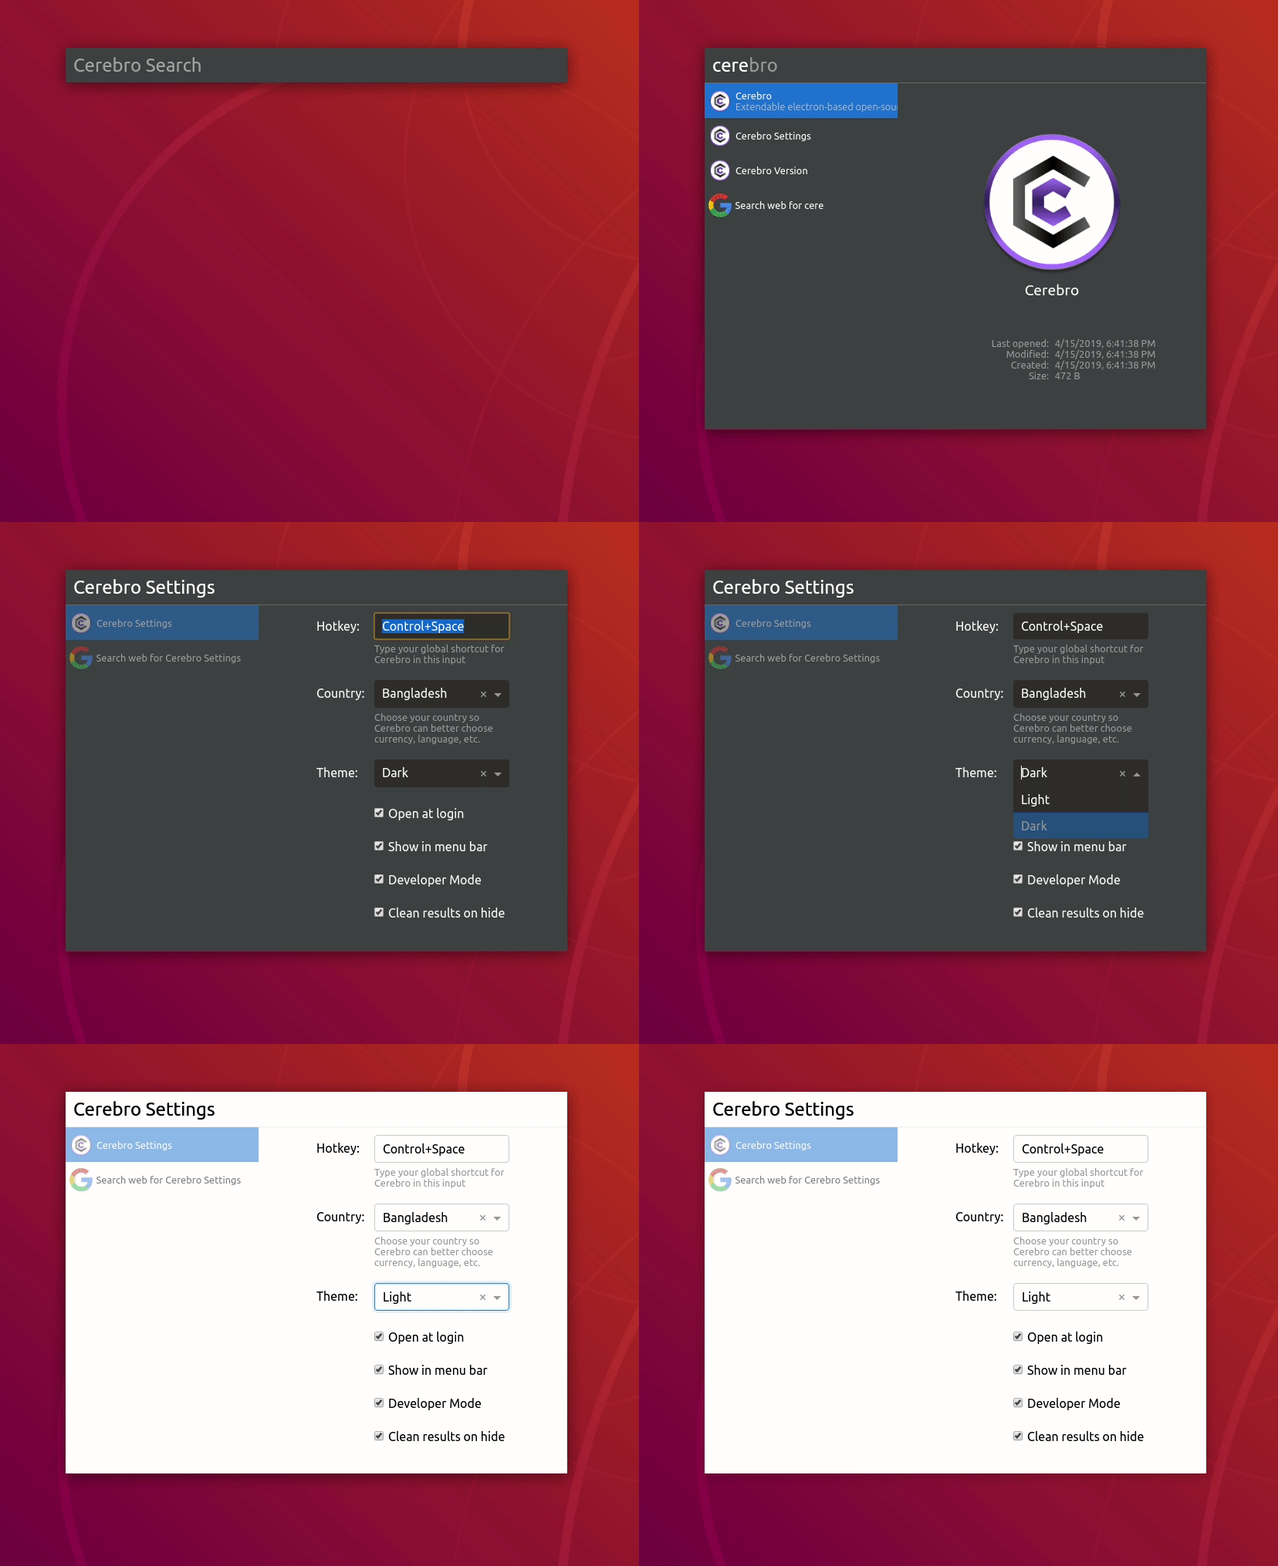
Use the shortcut ctrl+space to open the app window, and type Cerebro Settings. There you will be able to change the Theme.
Currently Light and Dark Themes are supported out of the box

Config file path
You can find the config file in the following path depending on your OS:
Windows: %APPDATA%/Cerebro/config.json
Linux: $XDG_CONFIG_HOME/Cerebro/config.json or ~/.config/Cerebro/config.json
macOS: ~/Library/Application Support/Cerebro/config.json
⚠️ A bad configuration file can break Cerebro. If you’re not sure what you’re doing, don’t edit the config file directly.
Build executable from source
If you’d like to install a version of Cerebro, but the executable hasn’t been released, you can follow these instructions to build it from source:
- Clone the repository
-
Install dependencies with yarn:
yarn --force -
Build the package:
yarn package
Note: in CI we use
yarn buildas there is an action to package and publish the executables
Install executable on Linux
If you’re a linux user, you might need to grant execution permissions to the executable. To do so, open the terminal and run the following command:
sudo chmod +x <path to the executable>
Then, you can install the executable by running the following command:
-
If you’re using the AppImage executable:
./<path to the executable> -
If you’re using the deb executable:
dpkg -i <path to the executable>
On some computers you might need run these commands with elevated privileges (sudo).
sudo ./<path to the executable>orsudo dpkg -i <path to the executable>
Contributing
CerebroApp is an open source project and we welcome contributions from the community. In this document you will find information about how Cerebro works and how to contribute to the project.
⚠️ NOTE: This document is for Cerebro developers. If you are looking for how to develop a plugin please check plugin developers documentation.
General architecture
Cerebro is based on Electron and React.
A basic Electron app is composed of a main process and a renderer process. The main process is responsible for the app lifecycle, the renderer process is responsible for the UI.
In our case we use:
app/main.development.jsas the main processapp/main/main.jsas the main renderer processapp/background/background.jsas a secondary renderer process
All this files are bundled and transpiled with Webpack and Babel.
The build process is managed by electron-builder.
Two renderer processes
This two-renderer process architecture is used to keep the main renderer process (Cerebro) responsive and to avoid blocking the UI when executing long tasks.
When we need to execute a long task we send a message to the background process, which executes the task asynchronously and sends a message back to the main renderer when the task is completed.
This is the way we implement the plugins system. Their initializeAsync method is executed in the background process.
Prerequisites
Install Cerebro
First, clone the repo via git:
git clone https://github.com/cerebroapp/cerebro.git cerebro
Open the project
cd cerebro
And then install dependencies:
yarn
Run in development mode
yarn run dev
Note: requires a node version >=16.x
Resolve common issues
-
AssertionError: Current node version is not supported for developmenton npm postinstall. Afteryarnpostinstall script checks node version. If you see this error you have to check node and npm version inpackage.jsondevEnginessection and install proper ones. -
Uncaught Error: Module version mismatch. Exepcted 50, got ...This error means that node modules with native extensions build with wrong node version (your local node version != node version, included to electron). To fix this issue runyarn --force
Conventional Commit Format
The project is using conventional commit specification to keep track of changes. This helps us with the realeases and enforces a consistent style. You can commit as usually following this style or use the following commands that will help you to commit with the right style:
yarn czyarn commit
Publish a release
CerebroApp is using GH actions to build the app and publish it to a release. To publish a new release follow the steps below:
- Update the version on both
package.jsonandapp/package.jsonfiles. - Create a release with from GH and publish it. 🚧 The release tag MUST contain the
vprefix (❌0.1.2→ ✅v0.1.2). - Complete the name with a name and a description of the release.
-
The GH action is triggered and the release is updated when executables are built.
License
MIT © Cerebro App
Описание
Open-source productivity booster with a brain