| 【EN】 | 〖RU〗 |
|---|
Bitmap to POV-Ray 3D triangle mesh converter
Python program for conversion of bitmap heightfield (in PNG or PGM/PPM format) to 3D triangle mesh in POV-Ray POV, Wavefront OBJ, Autodesk DXF and stereolithography (3D printer) STL format. Resulting triangle mesh provides better rendering in case of low-res source files as compared to using source bitmaps as a heightfield directly.
| Fig. 1. Example of img2mesh output rendering |
|---|
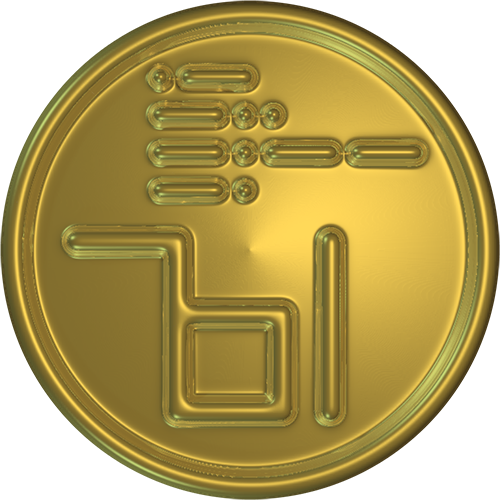 |
| Example of rendering obtained from black and white drawing (made in Inkscape from text and circle, with a bit of Gaussian Blur added in GIMP) after conversion to 3D mesh with img2mesh and changing texture from default to metallic in POV-Ray. |
Format compatibility
| Import image format | Export 3D mesh format |
|---|---|
| 16 and 8 bits per channel PNG, PGM and PPM | POV, OBJ, ASCII STL, ASCII DXF |
Project content
-
img2mesh.py - suitable GUI frontend comprising all programs and functions.
-
list2mesh module, including:
-
list2pov.py: nested 3D list to POV-Ray scene conversion and output. Exported file contain fully operational scene;
-
list2stl.py: nested 3D list to stereolithography ascii STL object conversion and output. Exported file contain elevation map mesh plus sides and bottom as needed for 3D printer;
-
list2obj.py: nested 3D list to Wavefront OBJ conversion and output. Exported file contain elevation map mesh only;
-
list2dxf.py: nested 3D list to Autodesk ASCII DXF conversion and output Exported file contain elevation map mesh only;
-
-
pypng and pypnm folders comprise:
| Fig. 2. Preview of img2mesh output files |
|---|
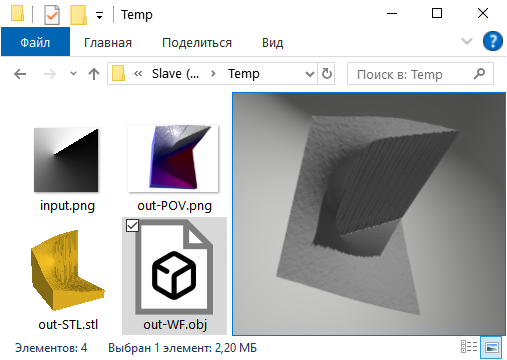 |
| Simple example of img2mesh output in different formats: a screenshot of Windows Explorer showing thumbnails for misc. files created by img2mesh from one input “in.png” map. |
Prerequisite and Dependencies
- Python 3.11 or above.
- PyPNG. Copy included into current img2mesh distribution.
- PyPNM. Copy included into current img2mesh distribution.
- Tkinter. Normally included into standard CPython distribution.
Installation and Usage
Img2mesh is equipped with rather self-explanatory GUI.
Since GUI is rather Photoshop-like when it comes to image zooming, panning etc., you are supposed to quickly forget and miss all the shortcuts and keyboard modifiers, as all the Photoshop users do. Therefore, first thing you’ll see once you start img2mesh will be a list of shortcuts for GUI functions. Once you forgot it successfully, you can always refresh your memory by pressing F1.
Quoth Mandarax:
Everything gets refreshed with
F5but human memory. For refreshing human memoryF1is assigned.
After opening an image, you’ll see image preview.
Img2mesh produces height map mesh combining two types of node geometry: №1 for sharp edges and №3 for smooth gradation (obviously, 1+3 gives us current Geometry №4, a combination of the above).
Choice between Geometry №1 and №3 is based on image local contrast (currently on difference between max and min for small window) - for areas with local contrast below user-defined threshold Geometry №3 is used, while №1 is used for a sharper areas.
Current version of img2mesh provides quick preview of the mask between Geometry №3 and Geometry №1 areas. Switching between source image preview and geometry mask is performed by mouse click, or Space press:
| Fig. 3. img2mesh dialog window |
|---|
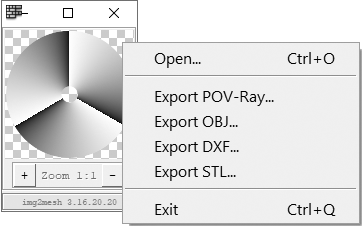 |
| Example of mask redraw following threshold changes. |
With “Auto update” ON, mask preview is updated as you change “Threshold”; with “Auto update” OFF you need pressing “Rebuild mask” manually to update it.
Once you decide that geometry mask select sharp vs. smooth areas just as you want, you may press “File…” button or use a right-click for main menu, and choose appropriate export function.
For developers
Export module, containing 3D-export functions, may be copied and used by other developers at will.
References
-
Wavefront Object Files (.obj) specs from Paul Bourke collection.
-
Cătălin IANCU et al., From CAD model to 3D print via “STL” file format.
-
DXF Reference by Autodesk, Inc.
Related
The Toad’s Slimy Mudhole website - more Python freeware for 2D image processing, POV-Ray and other 3D, and batch automation by the same author.
img2mesh page with illustrations, explanations etc.